She was in pretty good shape when we got her. The
interior was darn near perfect, but the exterior needs a little TLC.
- 10/14/2000 - Replaced nearly all the exterior screws with stainless steel equivalent.
Some of the originals broke off due to being rusted through.
Removed them with pliers or drilled them out.
- 10/14/2000 - Removed the rearview mirrors and sand and strip the rust and
paint. Primed and repainted. Again replaced all nuts, bolts and
screws with stainless steel fasteners. WOW, what a difference.
One mirror is severely rusted and will need to be replaced.
- 10/15/2000 - Got up on roof and resealed all vents and holes. Removed what was
left of an old TV antenna install.
- 10/15/2000 - Checked all the lights. Replaced a few bulbs, three of the
front marker lights will get replaced. Removed the rear taillight
assembly and cleaned off silicone sealant that was used to keep the
water out and had gathered a lot of dirt over the years.
- 10/15/2000 - Replaced the windshield wipers and polished the wiper arms to a
"like new" luster. Used small zip ties to hold the
washer fluid hoses down instead of the electricians tape that was
previously used.
- 10/16/2000 - Borrowed Dad's orbital buffer and applied fiberglass cleaner/polish
to the outside surface, followed by a coat of Carnuba wax.
There's still some shine left in her. :) The cab didn't need the
fiberglass polish, but sure benefited from the wax job.
- 10/20/2000 - The weather stripping around the coach door was old and crumbling.
Stripped it off and replaced it
- 10/25/2000 - Bought an Onan MicroQuiet 4KW generator.
Now we just need to get it installed. Found it on Ebay from Colorado
Standby for $2145. Call Larry at 719-264-0020
- 10/25/2000 - Installed a Pioneer CD
Player. Had some problems getting it wired. It didn't like
being plugged into the DC converter when the coach is plugged into
A/C. The voltage output would go up to almost 16v DC. all the lights
would get bright and the battery seemed to be getting warm.
Disconnected it from the DC converter side and hooked it up directly
to the battery. This works fine, but not sure how the battery
overcharge protection will work if we happen to be using the stereo.
- 10/29/200 - Fixed the cruise
control. At some point, the previous owner must have had a
transmission service done. The bracket that holds the cruise
control module was missing. We bolted the cruise module back in
with a bracket I had laying around and the cruise control works fine
now.
- 10/29/2000 - Also found the oil pressure
gauge was working intermittently. I cleaned the tab on the oil
pressure sending unit with some fine grit sandpaper, as well as the
connector on the wire. Pinched the connector a bit for a tighter
fit. Working great now.
- 10/29/2000 - Fixed the horn. The
horn was VERY sensitive. Removed the steering wheel cover and
pulled the horn guts out. The mechanism (if you can call it
that) was very simple. Two pieces of metal separated by
foam. Well, the foam has turned to mush over the years. Stripped the old
foam off and replaced with some leftover weather stripping. Now
the horn works as good as new and no more accidental BEEPS!!!
- 11/2/2000 - New tires all around.
The tires on it were over 20 years old. There was some checking
in the sidewall on the front tires and I don't want to chance it with
the rest of them. Piece of mind is worth it. Also ordered the
stainless wheel liners for a shiny new look.
- 11/10/2000 - Replaced Thermo-couple in
water heater. Used a Robert Shaw Part#1980-018 and it slipped right
in. Previously, the water heater would not stay lit. I
could get the main burner to light, but when it went out the pilot
would only remain lit for a few minutes, until the thermocouple cooled
down a bit. Now it stays lit till I turn it off.
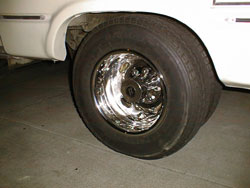
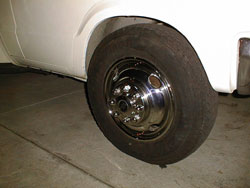
- 11/10/2000 - Had the Stainless Steel
Wheel Liners installed. WOW! What a difference. They look great.
Before
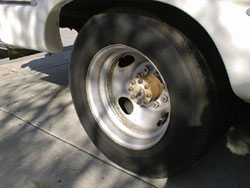 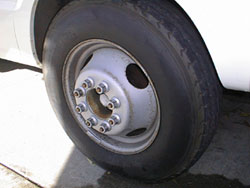
After
- 11/19/2000 - Installed an Onan Micro
Quiet 4000
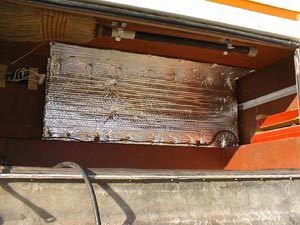 |
The foil insulation to help reduce
heat and noise to the interior. At the far right is a strip of
aluminum that will support a shelf over the top of the generator
once installed. We will still be able to store a few flat
items like the snoot boot and lug wrench even after the
generator is installed.
|
 |
View of all the connections. The
control panel is to the interior. It is just under the couch
next to the main electric control panel. |
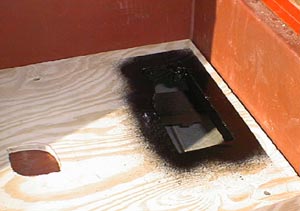 |
Used Bondo Spray-on undercoating
to seal the wood around the exhaust vent. While I was at
it, I shot a few other places where the original undercoating
was cracked or flaking. This is neat stuff and made quick
work of it. |
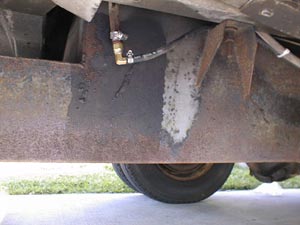 |
Detail of the fuel connection at
the tank. The tank had an existing pigtail of 5/16"
fuel line. The Onan uses 1/4" fuel line. I made
an adapter and did it at an angle to make the routing a bit
easier as well. |
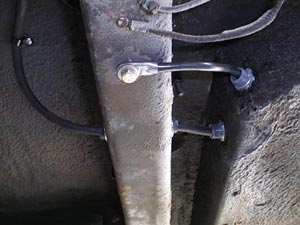 |
Detail of the ground wire attached
to chassis and the fuel line routed through existing holes in
chassis rail. Used 1/2 plastic conduit to keep the cables
and fuel line off the metal including a 4" piece through
the frame rail.
|
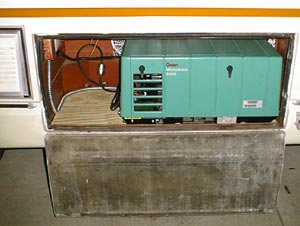 |
Installed! Still have a
little clean up to do. Tying the wires down and getting a
clip to hold the fuel filter in place. And we still need to put
a vent in the door. We still may need to relocate the spare
tire. Not sure if a bumper mount is the way to go or not.
They're ugly, but a whole lot easier than wrestling the OEM tire
carrier. I can't imagine trying to do that in the rain and
dark. |
- 3/28/2001 - Taillight lens replacement
It has bugged me since day one that both 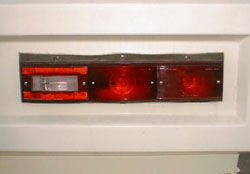 the
amber and red lights lit with brakes and blinkers. Rather than trying
to rewire things, I decided to just replace the amber lens with
another red lens. Only problem is finding the lenses. I
finally found them online at rvdriver.com
I ordered them and had them within 2 days. They were a direct
replacement. Just take the amber lenses off and put the red ones on. I
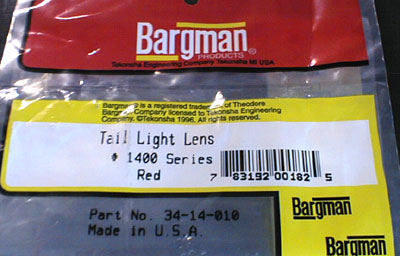
think they look better this way as well. Click HERE
for a picture of the bag with part numbers and bar code. the
amber and red lights lit with brakes and blinkers. Rather than trying
to rewire things, I decided to just replace the amber lens with
another red lens. Only problem is finding the lenses. I
finally found them online at rvdriver.com
I ordered them and had them within 2 days. They were a direct
replacement. Just take the amber lenses off and put the red ones on. I
think they look better this way as well. Click HERE
for a picture of the bag with part numbers and bar code.
|